TL;DR - If you’re just here for a script to set up the emulators, here it is. The rest of this post provides a detailed walkthrough of the setup.
I think it’s safe to say at this point that, as a data engineer, I love working in GCP. I’ve been labeled a fanboy and I’m perfectly fine with that. In my opinion, the developer experience is much better than that of AWS or Azure when it comes to going from absolutely no experience with the platform to Functional ThingTM in very little time. Needless to say, I recommend the platform to many people, especially those working with or building data-driven platforms at fairly large scale that haven’t committed to a public cloud provider.
However, I’m also cheap. Like, really cheap. And running petabyte or even terabyte-scale data pipelines in the cloud can be expensive. I’m definitely not trying to spend a ton of time and money experimenting with a platform I may not even enjoy or that may not work for my use case. If you’re working for an early-stage startup, time and money may will be an issue as well.
Thankfully, GCP provides emulators that run entirely on your local machine and (for the most part) work exactly as their expensive, cloud-based counterparts. In this article, we’re going to walk through building a simple streaming pipeline and run it, all without setting up cloud infrastructure or incurring the costs that come with doing so. Our pipeline will involve the following GCP tools:
- A Cloud PubSub topic and subscription (think Kafka)
- A Cloud BigTable instance (basically managed HBase)
- A Cloud Dataflow (Apache Beam) pipeline that streams from the PubSub topic and writes to the Cloud BigTable instance
Getting Started
Before we get too far into this, let’s set expectations. I’m going to make some assumptions, and you know what they say happens when you assume? Your GCP emulators work! So we’re going to assume the following:
- You’re working in a Linux-ish environment. Windows users can follow along, but steps will deviate at some point
- You’ve got a jdk set up for Java 8. If you don’t, I would suggest setting up jenv with an AdoptOpenJdk distribution (or several)
- You have Python 3.5+ installed
- You’ve created a GCP project
- You’ve installed the Cloud SDK
- As an alternative, you can spin up the Cloud SDK Docker image in a container and work from there
- You’ve authenticated to a project using the gcloud SDK (e.g.
gcloud auth login) and/or configured your application default credentials (e.g.gcloud auth application-default login).
Now let’s get to it. With the gcloud SDK, there are a number of components that are installed for you by default and a number of them that aren’t. Typing
gcloud components list
will show you what you already have installed and what’s available to install:
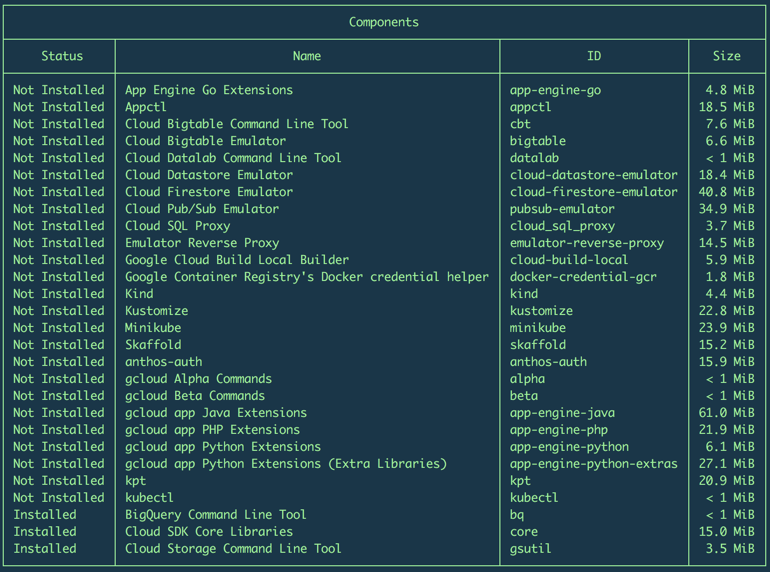
You’ll notice that the emulators we need are available, but not installed. To install them, run the following commands:
gcloud components install bigtable
gcloud components install pubsub-emulator
# we also need to install the beta commands to run the emulators
gcloud components install beta
You’ll also want to install the cbt command line tool, which we’ll use to interact with our Cloud BigTable instance:
gcloud components install cbt
The CLI is nice enough to give you a very detailed list of everything that’s being installed. Just say yes if you know what’s good for you want to continue with this walkthrough. Now we can get to the good stuff…
Starting the BigTable emulator
Now that everything is installed, we can spin up the emulators and we’ll start with BigTable. To get started right away, type
gcloud beta emulators bigtable start --host-port=localhost:8086
PRO TIP: You should probably start the emulator processes in the background. Just add
> ~/.cbt_emulator.log 2>&1 &to the end of the above command so you also have a place to see the output. You can kill the background process withkill -9 $(pgrep -f [g]oogle-cloud-sdk/platform/bigtable-emulator/cbtemulator)
The emulator starts up by default listening on port 8086, but you can use the --host-port option to specify a port of your choosing.
Before you can interact with the emulator, you’ll need to do some local environment set up. The first is setting the BIGTABLE_EMULATOR_HOST environment variable, which tells anything hitting the BigTable API to look for the emulator first. The emulator provides a command that will do that for you. Open a new terminal window and type the following command to see it:
$ gcloud beta emulators bigtable env-init
export BIGTABLE_EMULATOR_HOST=localhost:8086
and type the following to actually set the environment variable:
$(gcloud beta emulators bigtable env-init)
The env-init command will use whatever --host-port value you specified when starting the emulator (or the default if you left it out). Now we should be all set to use the BigTable emulator. Next, we’re going to validate that worked using the cbt CLI tool.
PRO TIP: These commands are setting environment variables on the fly, so you’ll want to make sure you’re staying within the same terminal session for the duration of this walkthrough.
Using the cbt CLI
Set it up
This pragmatically named command line tool is a good way to interact with BigTable instances in a simple and straightforward manner. As with most GCP tools, you need to specify at least a project, credentials, and some sort of service-specific identifier, in this case, the BigTable instance ID. One way to do that is with command line options:
cbt -project YOUR-PROJECT-ID -instance YOUR-BIGTABLE-INSTANCE-ID -creds "/PATH/TO/CREDENTIALS/FILE" somecommand
Aside from that being a bit verbose, its kind of annoying to have to explicitly set those values with every command. So if you’d like to prolong the life of those Cherry MX blues, you can create a config file in your home directory with these values:
cat <<EOF > ~/.cbtrc
project = whatever-you-want
instance = ${BIGTABLE_EMULATOR_HOST}
creds = /dev/null
EOF
I’m sure at this point you’re thinking, “I’m running this locally…I don’t have a BigTable instance in a GCP project! Why do I need credentials?!” Well…you don’t. For running the BigTable emulator, project, instance, and creds must have a value, but the only property that requires a legitimate value is the instance, which should be set to the host:port that your emulator is running under.
PRO TIP: I tend to leave this config file setup to interact with an emulator. That way, I have to explicitly provide credentials, projects, and instances when touching production environments.
Take it for a spin
I won’t go into an overview of BigTable and how it works in this walkthrough (I’m assuming you’re here because you’re at least somewhat familiar with it), so we’ll just run a few commands to see that our instance is up and running.
# create a table
cbt -project whatever-you-want -instance ${BIGTABLE_EMULATOR_HOST} createtable my_emulated_table
# verify it exists
cbt -project whatever-you-want -instance ${BIGTABLE_EMULATOR_HOST} ls
# create a column family in the table
cbt -project whatever-you-want -instance ${BIGTABLE_EMULATOR_HOST} createfamily my_emulated_table cf1
# optionally set a garbage collection policy to automatically expire data
cbt -project whatever-you-want -instance ${BIGTABLE_EMULATOR_HOST} setgcpolicy my_emulated_table cf1 maxage=7d or maxversions=1
Congratulations! You’re now the proud owner of a local BigTable instance!
Starting the Pub/Sub emulator
Remember we said we were going to build a streaming data pipeline? Well, BigTable will be the final destination for that data, but we need a source, right? Cloud Pub/Sub is an excellent solution for streaming data into GCP and integrates nicely into Apache Beam pipelines. And there’s an emulator! So let’s start it up:
gcloud beta emulators pubsub start --project=whatever-you-want --host-port=localhost:8085
PRO TIP: You should probably start the emulator processes in the background. Just add
> ~/.pubsub_emulator.log 2>&1 &to the end of the above command so you also have a place to see the output. You can kill the background process withkill -9 $(pgrep -f [g]oogle-cloud-sdk/platform/pubsub-emulator/lib/cloud-pubsub-emulator)
Using the Pub/Sub emulator
Set it up
As with the BigTable emulator, the --project property can be set to any value (but it must be set) and you can specify the port on which your emulator listens if you don’t want to accept the default of 8085.
PRO TIP: If you spin up the Pub/Sub emulator without explicitly setting the
--host-portoption, and another service is already listening on8085, the emulator will pick a random port to listen on. That being said, it’s a good idea to explicitly set this value to avoid conflicts, and to prevent accidentally starting multiple emulator instances locally!
Looks very familiar, right? You’ll notice the GCP emulators all work similarly. You can follow these same steps for the Cloud Spanner emulator almost verbatim.
Just like we had to set up our environment to tell things looking for BigTable instances to use the emulator, we have to do something similar for Pub/Sub, and there’s a similar command for setting the host as well:
# sets the PUBSUB_EMULATOR_HOST environment variable to its configured --host-port value
$(gcloud beta emulators pubsub env-init)
# we need to manually set the project ID variable, even
# though the emulator doesn't care about what the value is
export PUBSUB_PROJECT_ID=whatever-you-want
Take it for a spin
There is a nice gcloud command you can use to interact with Pub/Sub…but it doesn’t support interactions with the emulator (there’s always a catch, right?). Since you need to have some code to interact with the emulator, the folks over at Google were nice enough to provide some sample Python code that illustrates all the basic functions (e.g. creating/deleting topics and subscriptions, pushing/pulling to/from topics, etc.). I typically modify this code for my specific use case, but for this example, we’re going to use what’s already there.
I would suggest you pull down Google’s sample Python code, navigate to the publisher.py script and familiarize yourself with what it can do and how it works. You’ll notice a few things are hardcoded (the publish function, for example, will always publish the same messages to your topics if left unmodified), so just be aware of what you might wanna change. I’ve provided my slightly modified version of this script for those of you that are just a lazy as I am to help make things easier. Regardless of which one you go with, we’re gonna use it as-is, so let’s create a topic:
PRO TIP: If you cloned Google’s repo, don’t forget to follow the steps in the README and install the required Python dependencies and/or activate the virtual environment prior to running the scripts. If you cloned the repo I’ve provided, then my setup script will take care of that for you (among other things).
# assuming you're in the directory where the scripts exist...
# create a topic
./publisher $PUBSUB_PROJECT_ID create my_emulated_topic
# create a subscription
./subscriber $PUBSUB_PROJECT_ID create my_emulated_topic my_emulated_subscription
# publish some pre-defined messages to the topic
./publisher $PUBSUB_PROJECT_ID publish my_emulated_topic
# pull the messages off the topic using the subscription you created
# NOTE: this command listens indefinitely for input, so you'll want to
#       CTRL-C to kill it when you're done.
./subscriber $PUBSUB_PROJECT_ID receive my_emulated_subscription
Well how fancy do you feel now that you have not one, but TWO GCP emulators running?
Apache Beam Direct Runner (AKA not Dataflow)
Now we’ve got a way to get source data into our pipeline locally and we have a place to store it. Let’s get to processing the data with Apache Beam.
In case you aren’t familiar with it, Google Cloud Dataflow is just a runner for Apache Beam. If you’re familiar with Spark, Flink, or even Kafka Streams, working with Beam will feel somewhat familiar. Since we want to run everything locally, we’re going to use the Beam Direct Runner, which won’t give us the fancy UI we get with Dataflow, but we can test our pipeline end-to-end (almost) exactly as it would in Dataflow.
We won’t do a deep dive into Dataflow or Beam, but here’s what you need to know to continue:
- We’re going to just take the message text from our Pub/Sub topic running on our emulator and just dump that to a table in our BigTable emulator.
- Before writing to BigTable, we’re going to generate a random UUID to use as a key for each message. Not a great idea for a production system, but we’re just getting things running here for the time being.
In order to get the pipeline going locally, here’s what you’ll need:
- A stomach that can handle looking at some simple Java code (something something boilerplate something bloated blah blah blah. Stop it. Java is awesome. Just embrace it and come to the dark side.)
- A build file with the necessary dependencies (I’m a Gradle guy these days. Get away from me with your XML, Maven)
- A custom
PipelineOptionsclass that extendsDataflowPipelineOptions. We’re not doing anything fancy here, but you’ll need this if you’re going to run anything on Dataflow. We’ll also need some options in this class to tell our pipeline we’re using emulators. You can read more about that here. - And finally, a class that builds and runs your pipeline
Don’t worry…I’ve got you covered. If you haven’t already, just clone this repo, then, if your emulators are still running in the background, run the following to start the pipeline:
cd gcp-local-streaming-example
script/start-beam-pipeline
If all goes well, you should see this:
$ script/start-beam-pipeline
Checking for running Beam pipeline...
Pipeline is currently running. Killing it now...
Building and executing new pipeline...
Successfully started Beam direct runner in the background! Build and execution output can be found at ~/.beam_direct_runner.log.
PRO TIP: Nothing. That script will run the pipeline process in the background. You can kill the background process with
kill -9 $(pgrep -f gcp-local-streaming-example/build/classes/java/main)
That’s it. The log output of the pipeline should be written to ~/.beam_direct_runner.log.
Putting it all together
WHEW So let’s see what we’ve done:
- Got our BigTable emulator running (our data’s final destination)
- Started up the Pub/Sub emulator (the source of our streaming data)
- Set up a Beam pipeline that will run locally (the thing that moves our data from source to target)
Assuming you’ve got everything running in the background, you can go back to the publish script we ran earlier to generate some data and it should flow into your local BigTable instance.
# cd back to the directory where you cloned the sample Python code first, then
# publish some pre-defined messages to the topic. Run this as many times as you want
publisher $PUBSUB_PROJECT_ID publish my_emulated_topic
Now you can check your table and see a number of rows written:
$ cbt read my_emulated_table
----------------------------------------
0807024e-2d0e-4cc4-8067-5efc3e4b2f3f
  cf1:my_data                              @ 1969/12/31-19:00:00.000000
    "Message number 6"
----------------------------------------
199fcbf1-f457-49f0-aad8-29d2df2f5894
  cf1:my_data                              @ 1969/12/31-19:00:00.000000
    "Message number 6"
----------------------------------------
1ba5a26c-bb73-4030-b7c5-3a21d193559f
  cf1:my_data                              @ 1969/12/31-19:00:00.000000
    "Message number 4"
----------------------------------------
236ec7b2-15d1-4d83-bffa-b6c870fc9d5b
  cf1:my_data                              @ 1969/12/31-19:00:00.000000
    "Message number 8"
----------------------------------------
29edc6b0-3f37-4e8b-a305-cc1c4bb9ca8c
  cf1:my_data                              @ 1969/12/31-19:00:00.000000
    "Message number 5"
----------------------------------------
PRO TIP: NEVER run
cbt readagainst a production instance without limiting the number of rows using some sort of filter (e.g. count, prefix, start/end, etc.). This triggers a table scan which, aside from being painfully slow, could have wider ranging performance impacts on your cluster.
That’s it. You’ve run an end-to-end streaming data pipeline, using GCP’s managed services on your local machine and didn’t spend one. single. penny.
Oh…and as an added bonus for making it this far, I’ve provided this script to run all the setup for this entire walkthrough and get everything started for you. You can run the following and should see output similar to this:
# IMPORTANT: This script sets environment variables, so you need to
#             source the file(e.g. source or a dot before the script name)
#             instead of execute it. The same goes for script/stop-all.
$ . script/start-all
Checking gcloud installation...
Installing gcloud beta components if needed...
Installing bigtable emulator if needed...
Installing pubsub emulator if needed...
Installing cbt CLI if needed...
Starting cbt emulator...
Starting pubsub emulator...
Configuring local environment to use the cbt emulator...
Configuring local environment to use the pubsub emulator...
Installing google-cloud-pubsub python package...
Successfully started the cbt and pubsub emulators! Creating resources on those emulators...
Creating table [my_emulated_table]...
Creating column family [cf1] for table [my_emulated_table]...
Creating pubsub topic [my_emulated_topic]...
Creating pubsub subscription [my_emulated_subscription] for topic [my_emulated_topic]...
All emulators are up and running!
Building and executing new pipeline...
Successfully started Beam direct runner in the background! Build and execution output can be found at ~/.beam_direct_runner.log.
$ script/publisher $PUBSUB_PROJECT_ID publish my_emulated_topic
1
2
3
4
5
6
7
8
9
Published messages.
$ cbt read my_emulated_table
----------------------------------------
055595bb-ea8c-4e1d-8798-fce6b2d8c4c5
  cf1:my_data                              @ 1969/12/31-19:00:00.000000
    "Message number 3"
----------------------------------------
23b3db3f-edfa-4c1a-9136-dfb3c77c7007
  cf1:my_data                              @ 1969/12/31-19:00:00.000000
    "Message number 7"
----------------------------------------
29f6d288-9483-4696-9bde-50a97faff1c2
  cf1:my_data                              @ 1969/12/31-19:00:00.000000
    "Message number 1"
----------------------------------------
3a467299-5ad4-4cec-b229-519b69867930
  cf1:my_data                              @ 1969/12/31-19:00:00.000000
    "Message number 5"
----------------------------------------
692425fd-4119-44ff-8f67-b295f4785153
  cf1:my_data                              @ 1969/12/31-19:00:00.000000
    "Message number 8"
----------------------------------------
80a7d16c-3ad3-406a-992a-46caa0ff2240
  cf1:my_data                              @ 1969/12/31-19:00:00.000000
    "Message number 9"
----------------------------------------
94f3840e-b2be-48d1-b78f-68e4e8238212
  cf1:my_data                              @ 1969/12/31-19:00:00.000000
    "Message number 6"
----------------------------------------
953169a0-f0e5-45f8-bad9-e78deb6b26e1
  cf1:my_data                              @ 1969/12/31-19:00:00.000000
    "Message number 2"
----------------------------------------
d2c786ff-5e76-44d7-b910-8b2861c9a9f0
  cf1:my_data                              @ 1969/12/31-19:00:00.000000
    "Message number 4"
Enjoy!